This project all started when I spied these cute letters at Hobby Lobby, covered in burlap with a nailhead trim border. That got me to thinking, “How cool would that look on a piece of furniture?!” After diving into some research, I realized I was a bit late to this party. Although it is still relatively new, there are already tons of cool DIY pieces with burlap or fabric and nailhead trim. I knew I still wanted to tackle this idea in my own way and after browsing tons of images, I got even more inspired. Houzz has the best stuff, and that’s where I got most of my inspiration.

Here’s how mine turned out, for a fraction of the price of the ones above 🙂

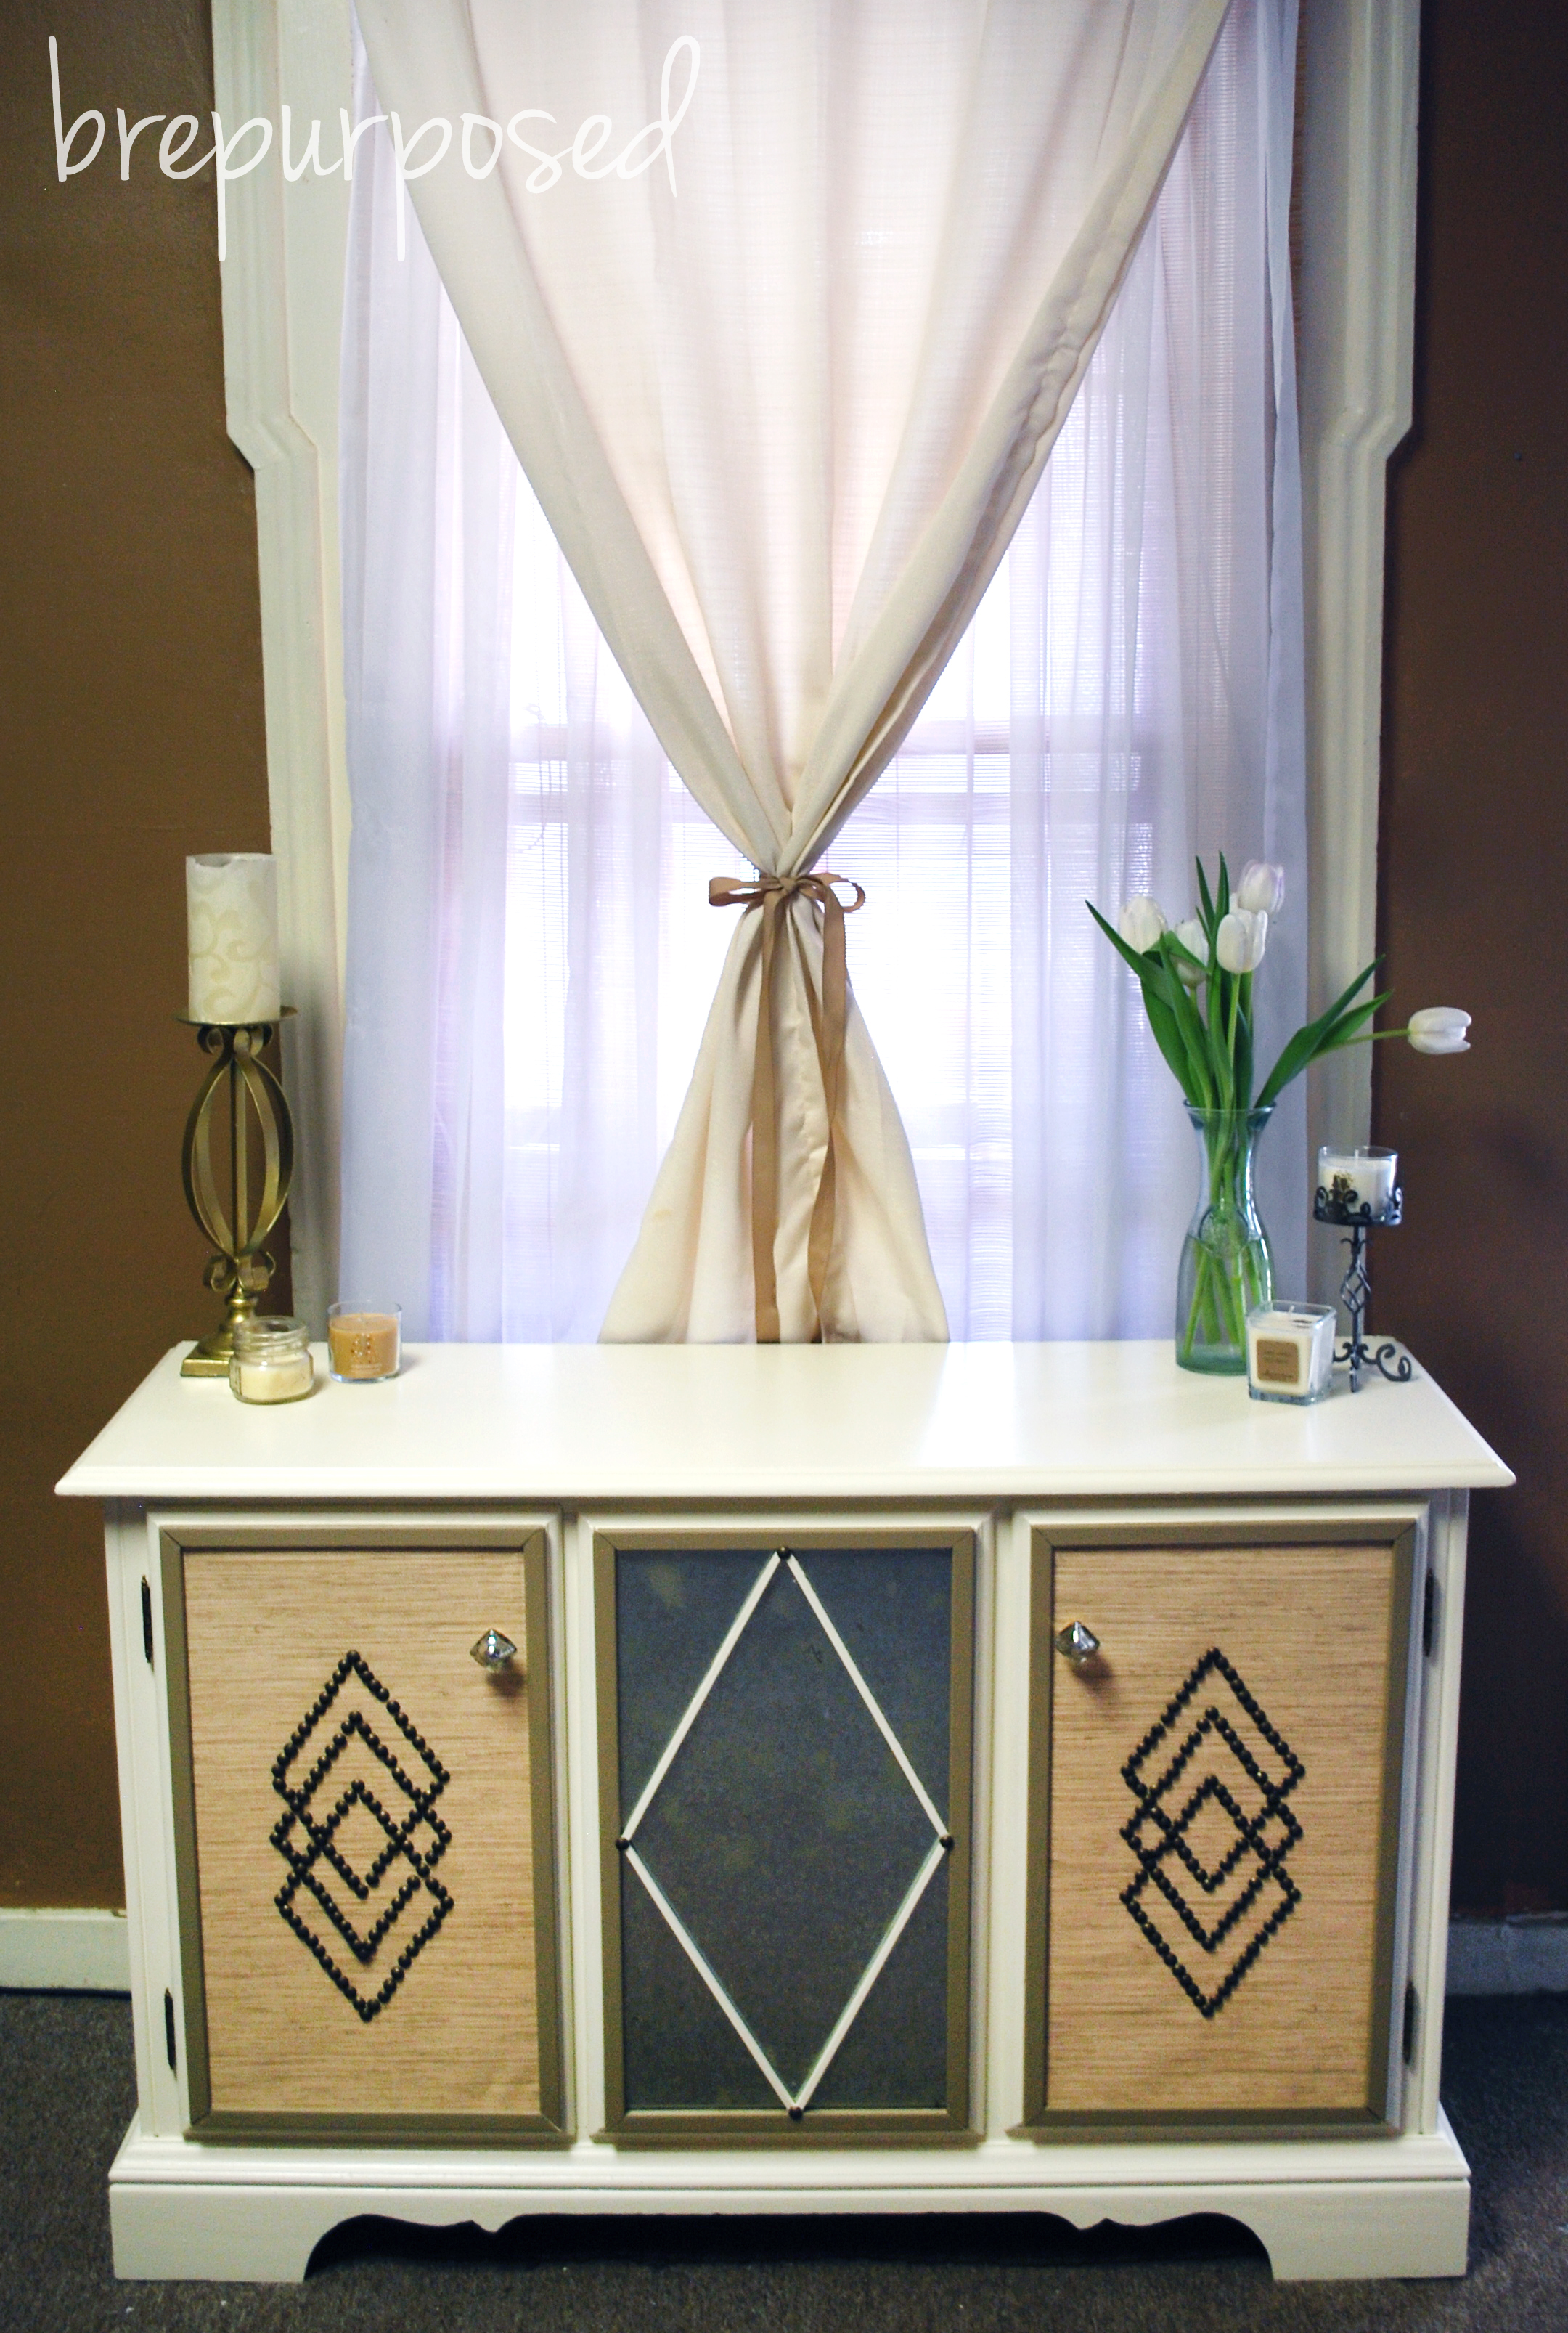
At this point, I was planning on using the 4-drawer dresser I got free on Craigslist for this project, although I really wanted a media console of some type. I told myself I’d allow one more day of Craigslist stalking before I began, just in case something better popped up. Good thing I waited because this beauty fell right into my lap and I was able to knock $10 off the asking price and got it for $30, score!

I wanted something a little more fancy than burlap and read about Grasscloth wallpaper, only to discover it is WAY too pricey for this girl. Good thing there is a faux version of practically everything these days. I found it on Ebay here. I decided I wanted to add mirrors as well, after falling in love with that antiqued glass look in the above pieces. My Home Depot doesn’t cut glass which I was banking on, but luckily my local Ace Hardware did. I got a piece for the middle panel and one for both sides, each around $7-$8 which was a great price!
Now that I collected most of my materials, I was ready to start the transformation. There were a couple bumps and bruises on the top, so I sanded those down, but other than that, this piece was in pretty great shape. I began by priming, using Zinssers’s Cover Stain which I really like, other than the odor. I applied two coats to the top and one coat to the rest. Most of the panels were getting covered up by either glass or the grasscloth, so that eliminated a lot of the surface which needed covered.

When I stopped at Home Depot I forgot to bring my roll of wallpaper with me to match up with some paint, so I ended up going to my hardware store instead. They had $5 sample cans of Valspar paint, and I ended up going with Country White. I knew I wanted to add some moulding around the grasscloth on the doors, and decided to do that in a different color; I chose Urban Khaki.
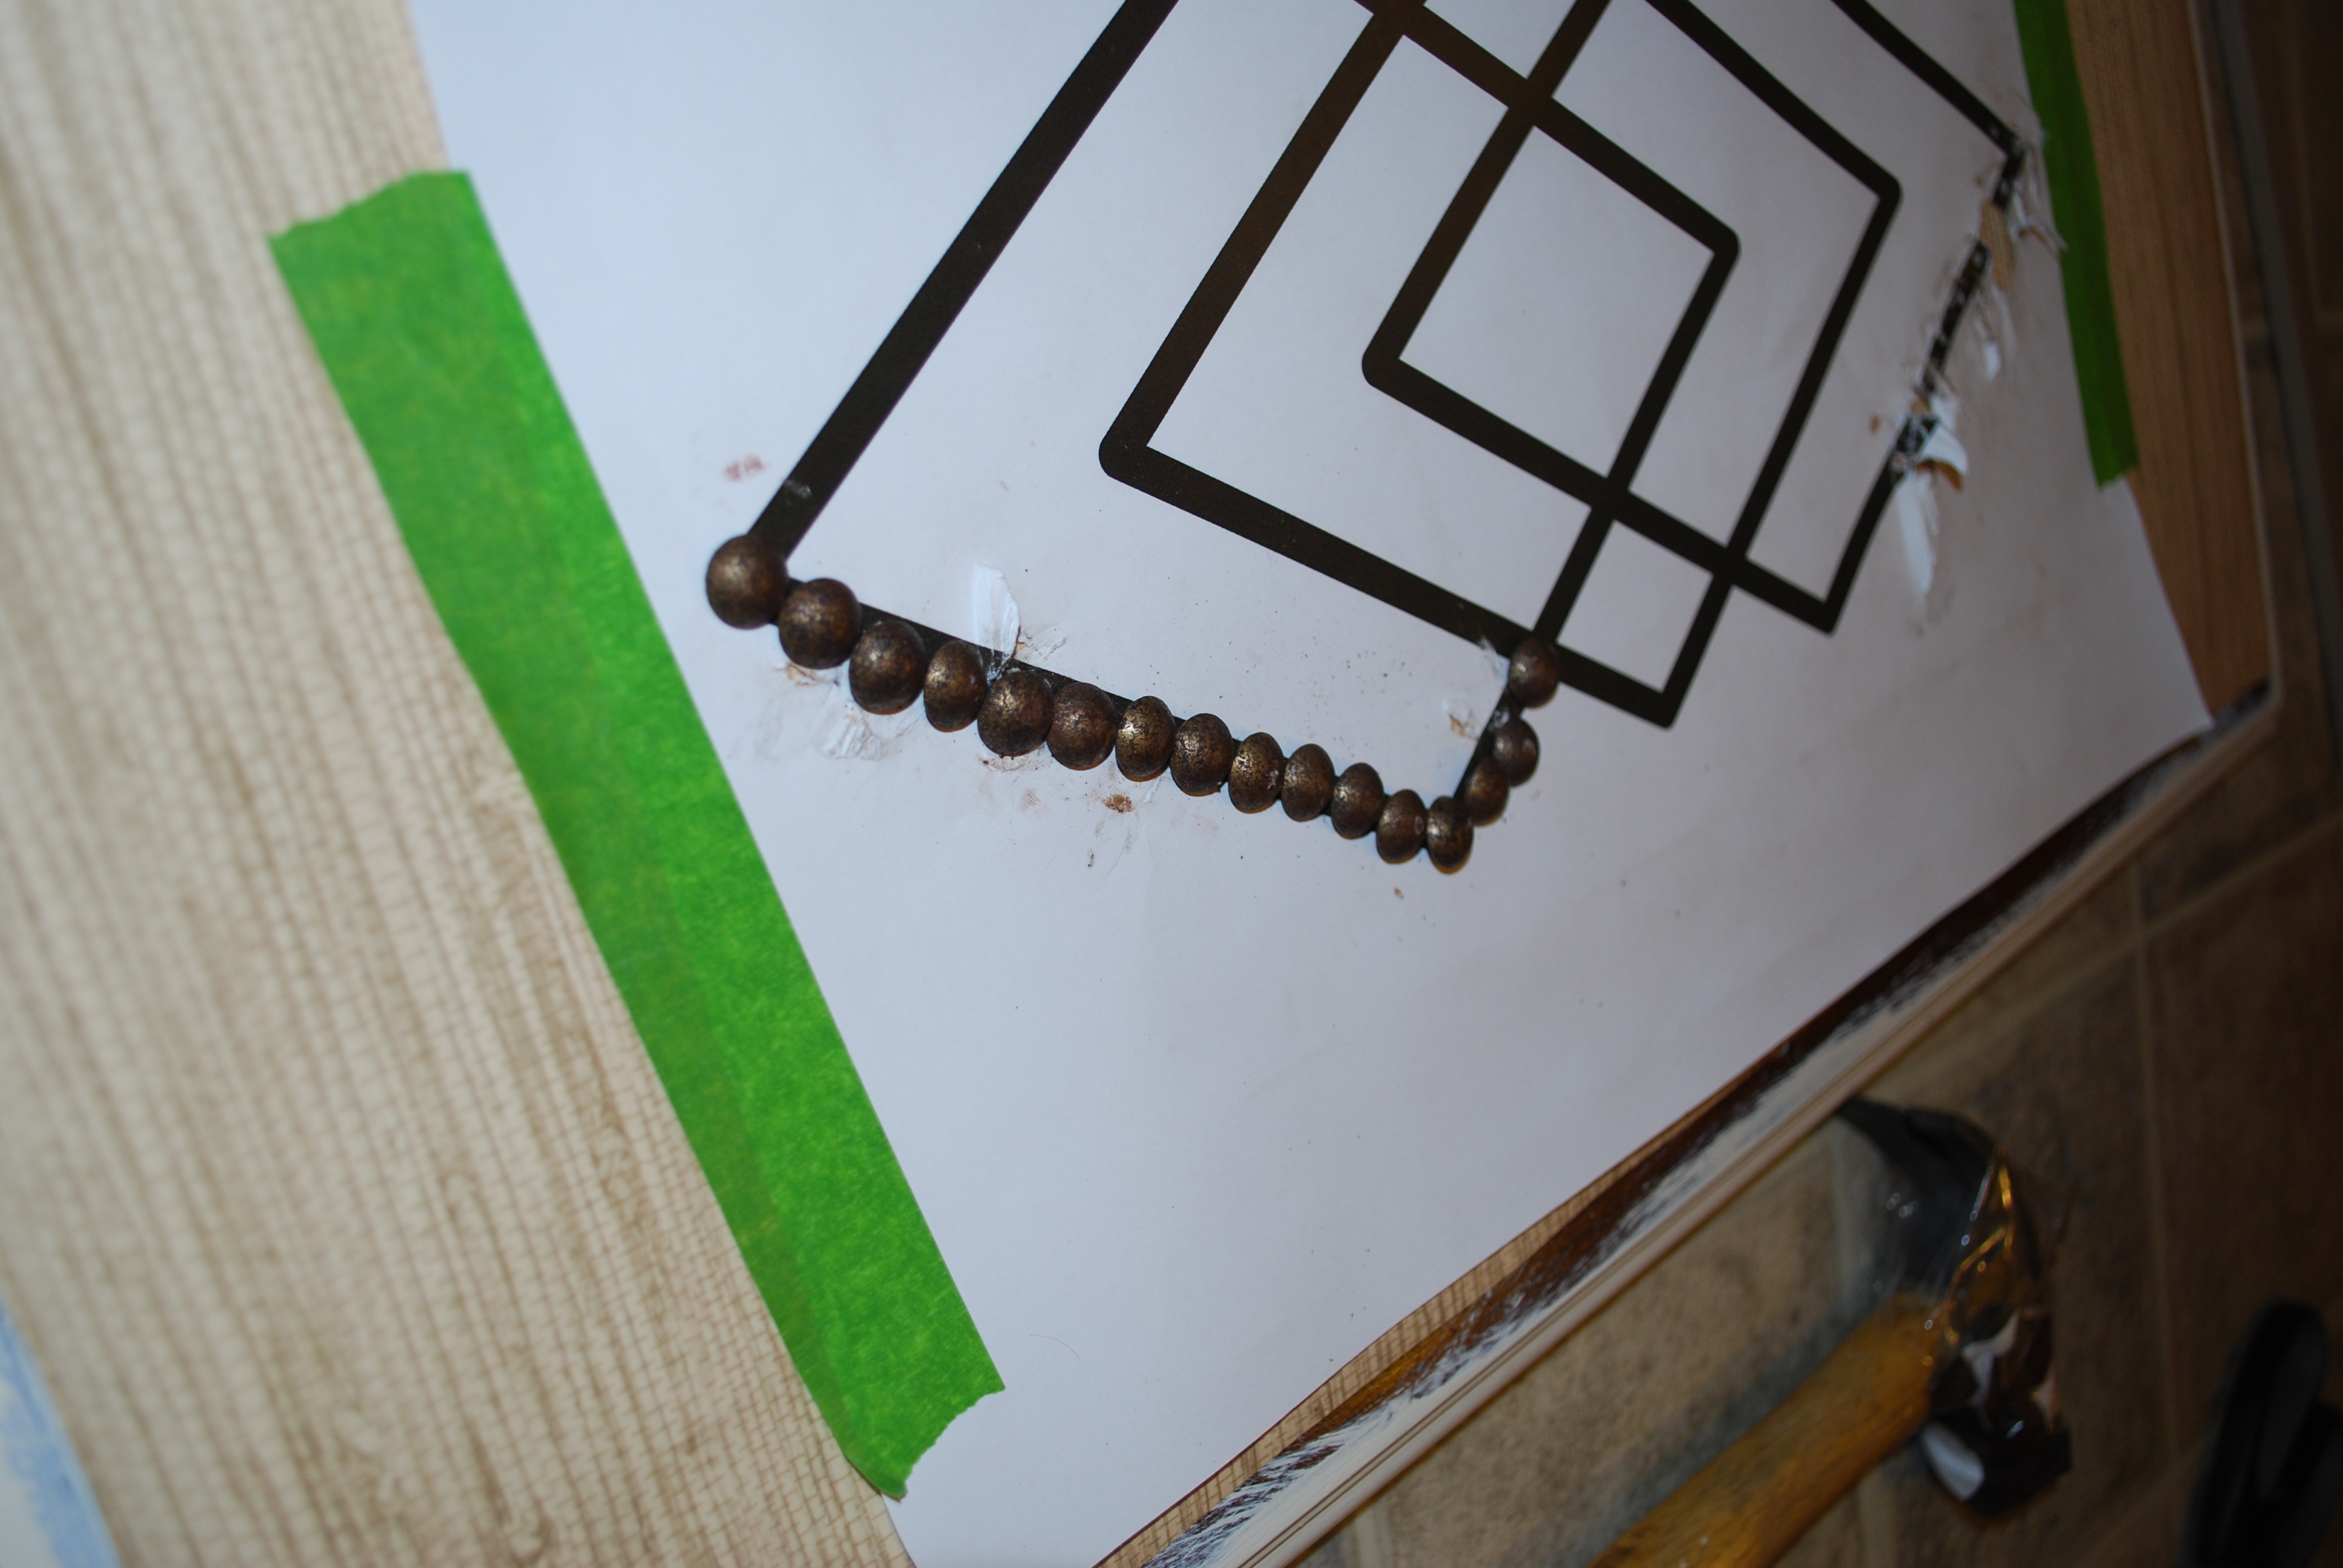
After painting, I used 2 coats, it was time to tackle my nailhead trim. Let me tell you, this did not go as smoothly as anticipated and I wanted to rip my hair out multiple times. I cut my wallpaper to size and hot glue gunned it down at the corners and then placed my pattern that I made in Illustrator over top. All lined up and ready to go, except these stubborn little (I’ll refrain from what I was actually calling them) nails did not want to go in straight.


After attempting to get the first few straight, and not succeeding, I ripped them all out. Attempt #1: FAIL.

Ok, deep breaths I can do this. I tried to muster all the patience I had, and tried again. Attempt #2: FAIL.
At this point I was really ready to give up. I ripped everything off and did some googling. I was using a regular hammer and most people recommend a tack hammer. Bingo! This would for sure solve my problems.

After learning that Wal-Mart doesn’t sell tack hammers, I was getting even more infuriated. I opted to go there instead of the hardware store because I wanted to browse other options in case this really wasn’t going to work. Pointless, because Wal-Mart had nothing to offer me. I didn’t want it to be a total waste of a trip, so of course I had to support the Girl Scouts and buy a box of Samoas. This would give me the energy I needed to hammer those suckers in straight. I stopped and got the tack hammer at the hardware store and settled down on the kitchen floor, Samoas and hammer in hand.
Attempt #3: FAIL. Third time’s a charm right? NOPE. These darn nails would NOT go in straight no matter how hard I tried. I may have shed some tears at this point and eaten half the box a couple cookies. I honestly had no idea what to do and just sat on the floor and stared at my terribly crooked mess. Not only was it a pain to hammer them in, but getting them out was even more challenging and my fingers felt like they were about to fall off. I decided to do some more googling and get to the bottom of this. I couldn’t be the only one this has happened to right?!
Thank the sweet lord jesus for forums. Some guy answered a women’s question about crooked nailhead trim saying that if your wood is hard you should drill pilot holes to help the nails go in. OMG. GENIOUS. THANK YOU. Why didn’t I think of that?? I was back in the game, baby!

Look how straight they are! Looks like a success right? Wrong.
Attempt #4: FAIL. I had the bright idea of hammering the nails in on top of my pattern and thinking I would just slip that paper right out from under them when I was done. Clearly, I wasn’t thinking straight at this point. I spent way too much time thinking it would still be ok and using my tweezers to pull little pieces of paper out from under each nail. NOT WORTH IT. I ended up redoing it AGAIN, still using my pattern but not hammering the nails in all the way, so I could pull the paper away easily afterwards. Thank goodness I had a big roll of my wallpaper because I had to recut a new piece each time I messed up with the nails.

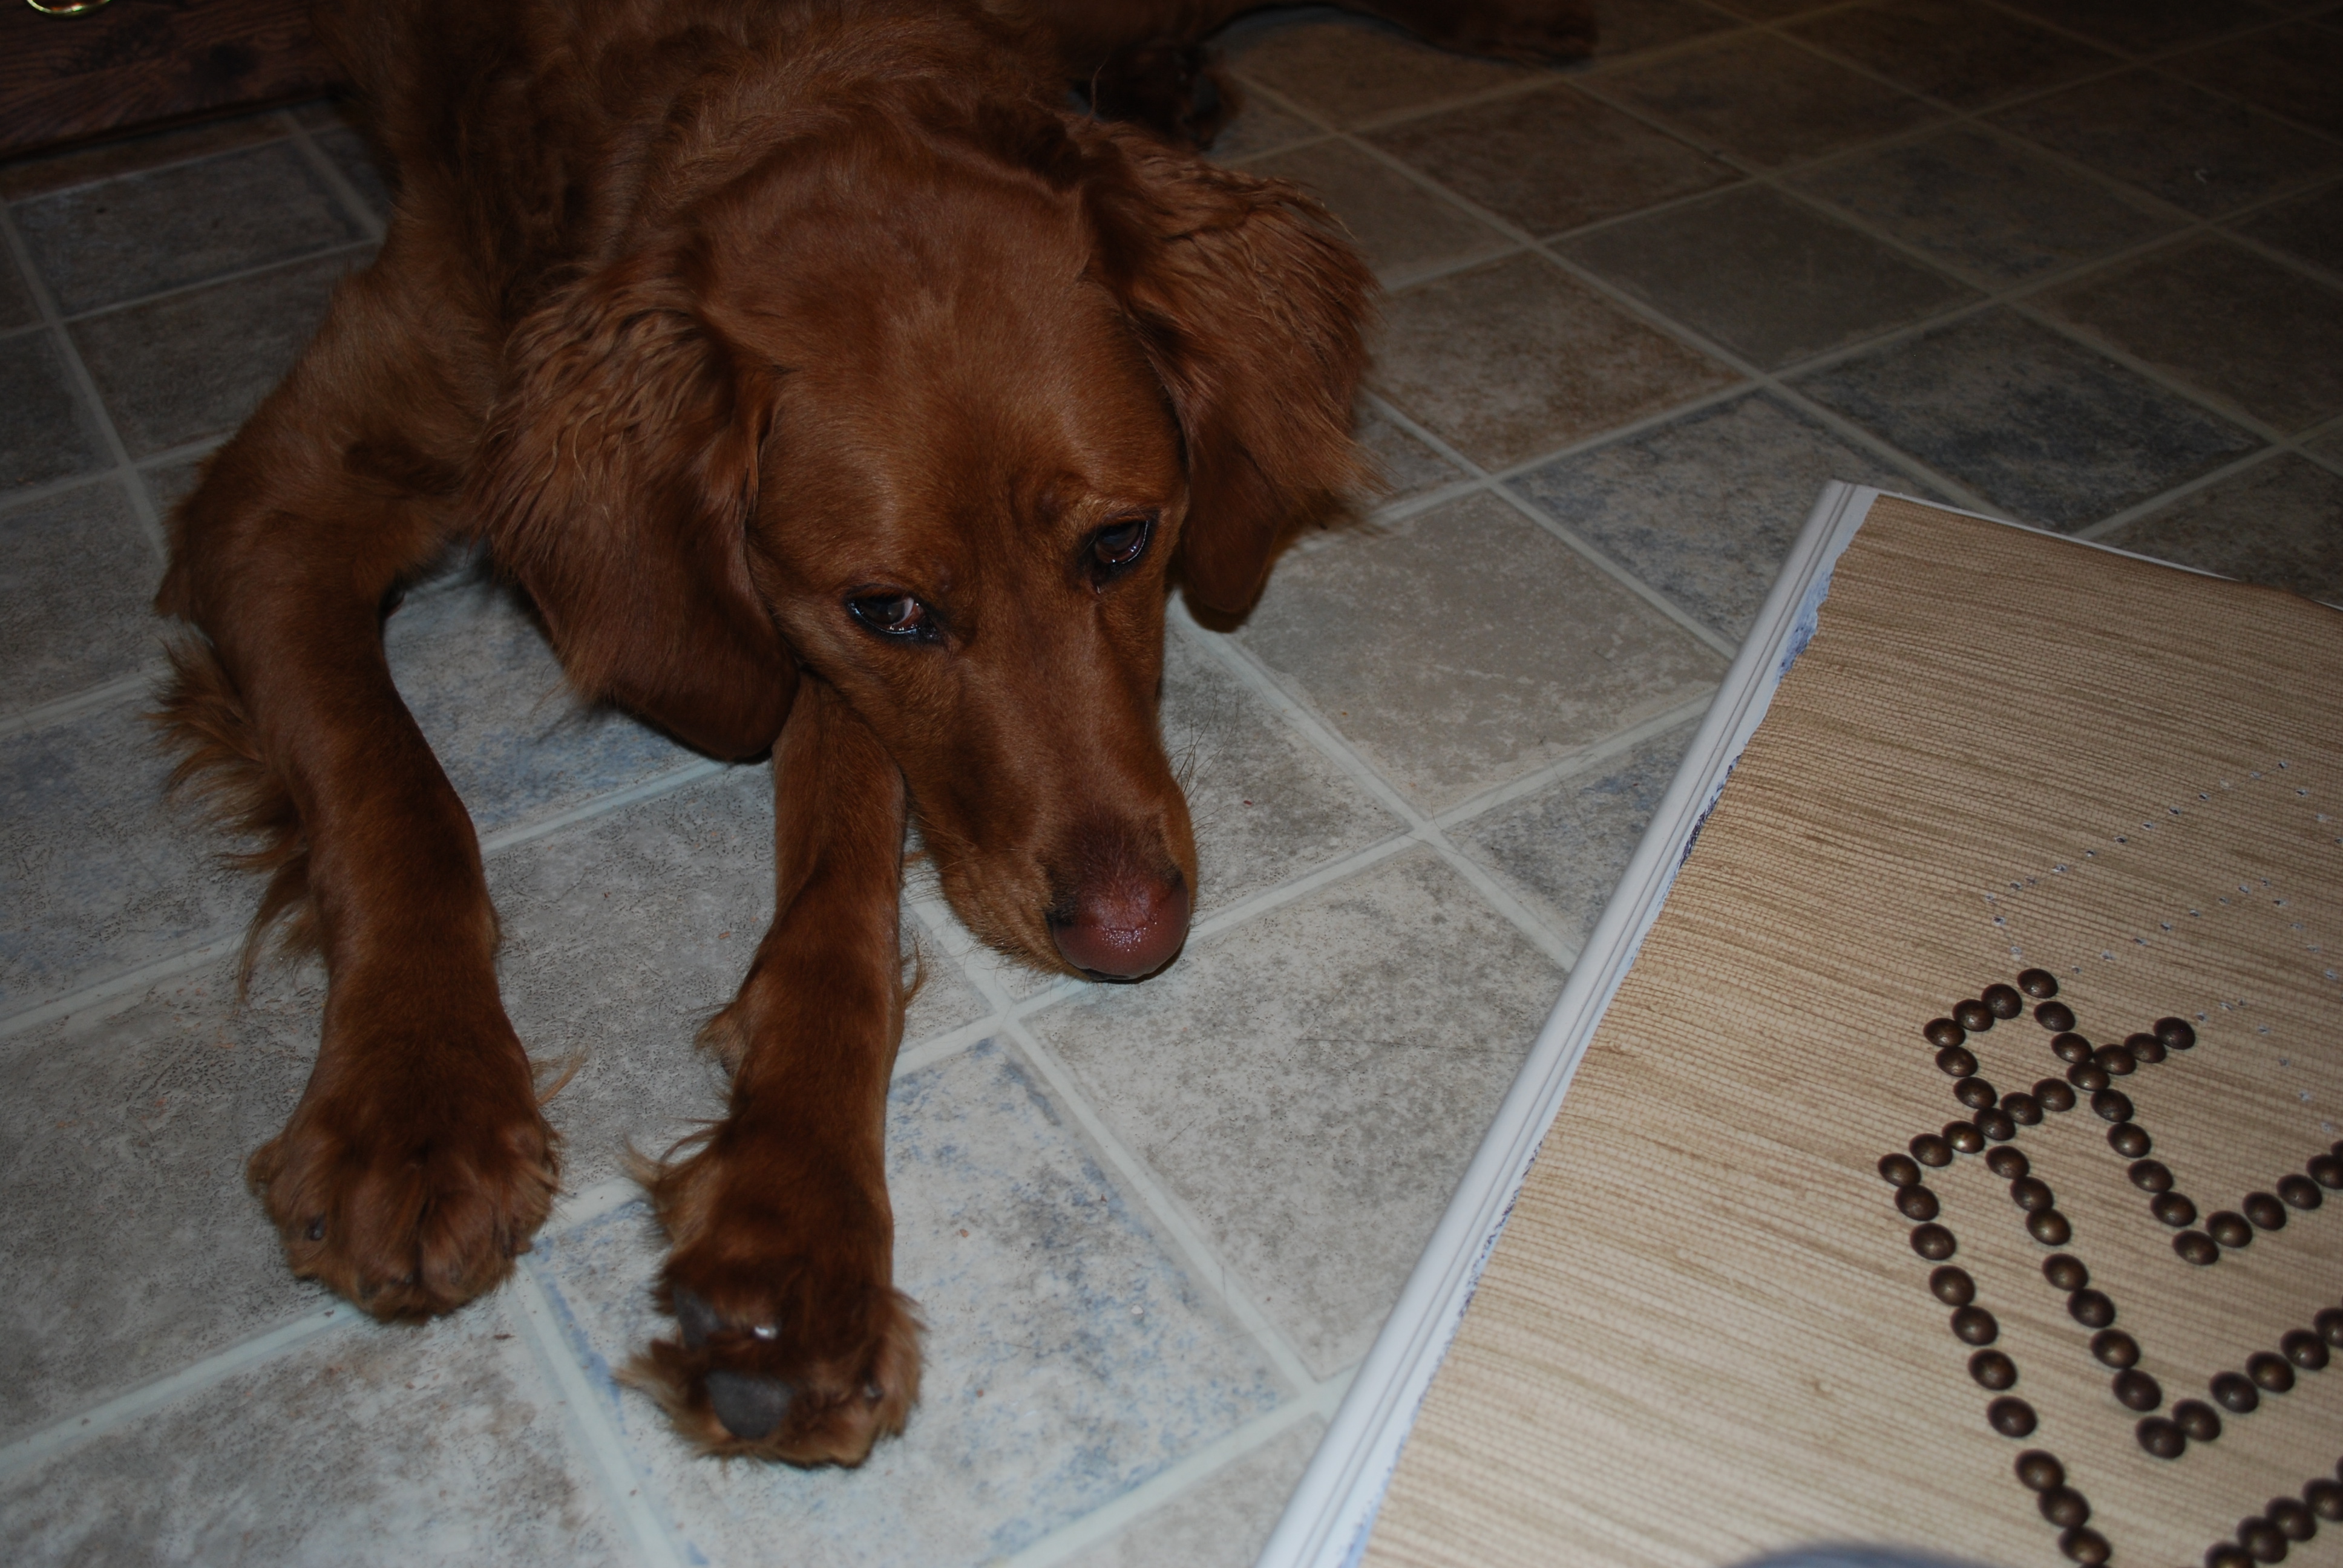
Now that looks better! Attempt #5: SUCCESS! Oakley didn’t share my excitement…
I used a Miter Box to cut my moulding and glued that on around the edges.

Once I had both of those doors finished, it was time to move onto the glass. I knew I wanted the mercury glass/antiqued look and read a ton of DIY tutorials on how to make it. I took tips from them all and kind of did my own thing. I used the half water/half vinegar solution in the spray bottle and the Krylon Looking Glass spray paint.

I first sprayed each of my glass panels with the water/vinegar solution and followed it up with a thin coat of the spray paint. I repeated these steps, letting each coat dry in between for a few minutes. I got the speckled look that I wanted and went back in with a rag covered in the water/vinegar solution to dab away some more of the paint. I didn’t feel like I got a very clear “mirrored” look, which was actually fine with me since I wanted it to be more antiqued anyway.

One tutorial I found, used gold craft paint on the back of her mirror to fill in the holes that were wiped away with the rag. I found it on Shine Your Light’s blog and you can read more about it here. I wanted to fill my holes in with gold to add to the texture, otherwise you would have seen the wood of the console through it. I did a lot of research on what kind of glue to use and it looked like most people used Liquid Nails Mirror Adhesive. There were some mixed reviews on it however, and unfortunately, no store near me carried it. I ended up going with some Gorilla Glue Epoxy, which dries super fast and worked like a charm!

I clamped the glass in place and let it sit overnight.

At first, I wasn’t super happy about the way the mirrors turned out. I found that the water/vinegar solution in the spray bottle made too many blobs and looked too blotchy. I wanted to add a little more “distressing” but I had already covered the backs with spray paint. I had already glued on the middle panel, so that one was staying, but I tackled the other two with some nail polish remover and was able to remove some of the spray paint and make them look more the way I wanted. I covered the backs with spray paint again and glued and clamped them onto the console. Note: wear gloves when you handle glass! I learned the hard way with the first piece I carried over to glue on.

These side panels of glass were much easier to glue on, as there was a little ledge for them to sit on at the bottom, but I still clamped them up for extra support.

That’s more like it. Love it! Are you still awake? I know this is a long post and I hope I’m not boring you, almost done, promise!
Overlays are another thing I love, and haven’t worked with yet. I got some square dowel rods at home depot for like $.80 a piece and used my Miter box again to cut four pieces out to go over the middle piece of glass. Sticking with my diamond theme I used with the nailhead trim, I just made a simple diamond, painted in the same color as the console and covered each spot where the dowels met with a top from the nails I used.
I finished the piece using Minwax Polycrylic in Clear Satin, putting a few coats on the top and just a couple on the rest of the piece. Some new hardware to the doors and voila! Check out this baby now.


I’m so excited to be entering this project into East Coast Creative’s Creating with the Stars Competition. Go big or go home, right?!


Ashley@BiggerthantheThreeofUs
Wow, this is really cool. I would have never thought to actually but a design into the nail heads. Great job.
brepurposed
Thanks, Ashley! It was a pain in the butt, but worth it in the end.
Nancy
Absolutely amazing! Great job and great “stick to it”! Thanks for showing and telling it all, it is helpful and inspiring….
Nancy
wildoakdesigns.blogspot.com
Katie @ Upcycled Treasures
WOW, talk about a labor of love! I suck at getting those nails in straight too and had read about using cardboard to line them up but haven’t tried it yet because I keep getting impatient and thinking I’ll get the next one straight…um not so much haha. Good call on the Samoas those are my fave girl scout cookies and nothing like a little cookie motivation to get a project done 🙂
Pinned! Thanks for sharing at The Makers!
brepurposed
Thanks, Katie! Those little nails are tricky but keep practicing! The end result is always worth it, and cookies always help 🙂
Christina Makri
I look at it again and again! It turned out gorgeous and all these details, great tutorial, thank you Bre 🙂
P.S I am going to share it in my facebook page http://www.facebook.com/ArtDecorationCrafting
brepurposed
So glad you liked it! And thank you for sharing!!
Teri
So gorgeous! And it was SO UGLY before! Clearly the hard work paid off… Thanks for sharing!
mandyjeanchic
How awesome!!!!!
Rose
Looks really great….what a way to recycle.
brepurposed
Thanks Rose 🙂
Monica
This turned out great! I love how you kept it real and showed all of your fails!! Thanks for linking up to Creating with the Stars!
brepurposed
Thanks, Monica! So excited for the competition to begin 🙂
sweetsimplestuff
You had me at “mercury glass & nailheads”, LOL! I love the finished results … great redo of older furniture!
brepurposed
Thank you! Who doesn’t love some mercury glass and nailhead trim right?!