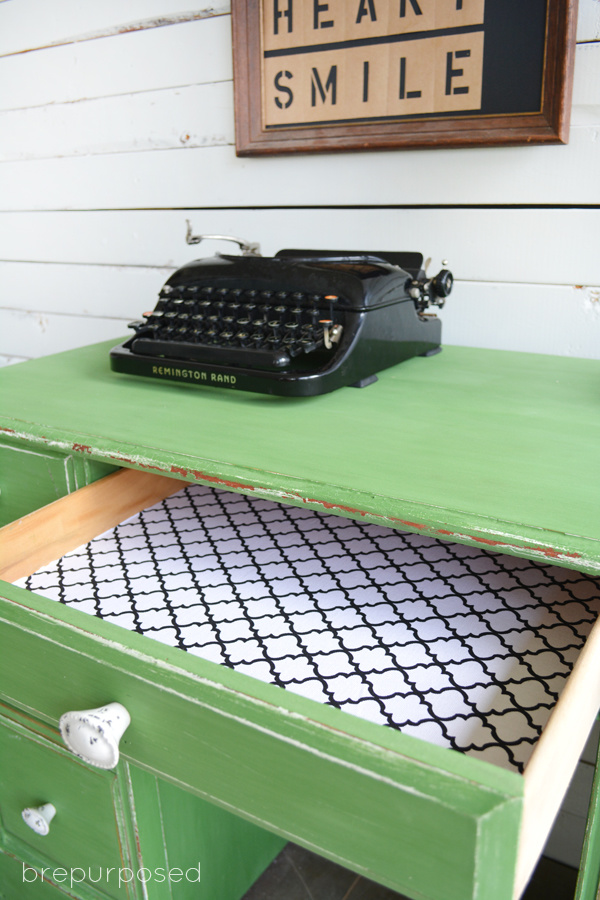
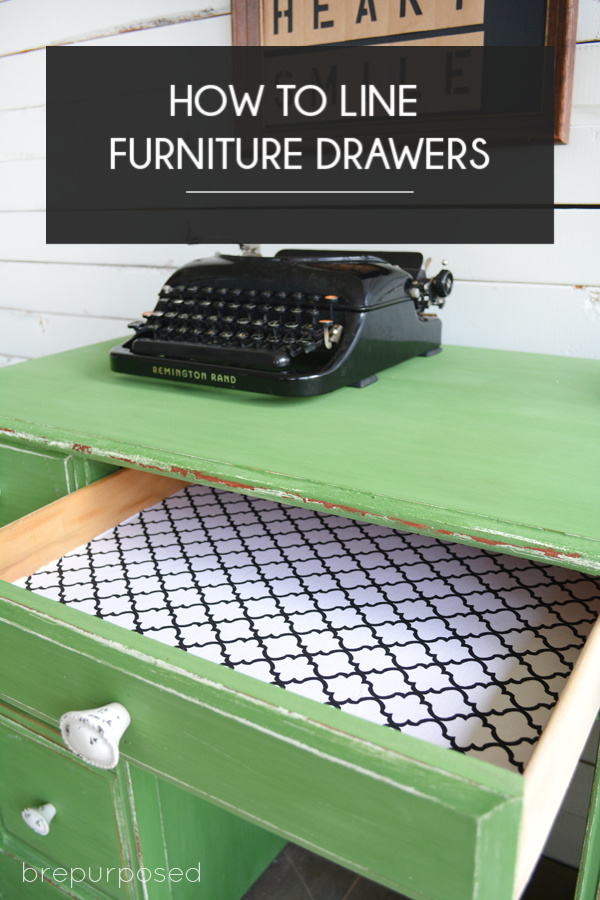
I’ve gotten asked this question a bunch of times, so I figured it was time to share my secret on how to line furniture drawers! Lining the drawers of my furniture is something I’ve started doing a lot more recently and has become one of my favorite parts of the whole process. Much like picking out the perfect knobs, picking out the perfect paper or fabric for the drawers is like accessorizing a piece, and who doesn’t love accessorizing?
HOW TO LINE FURNITURE DRAWERS
I also love that it’s like a little surprise when you open the drawers. Some might say it’s a silly thing to do since most of the time you just fill your drawers with a bunch of stuff and it covers up the fun pattern anyway.
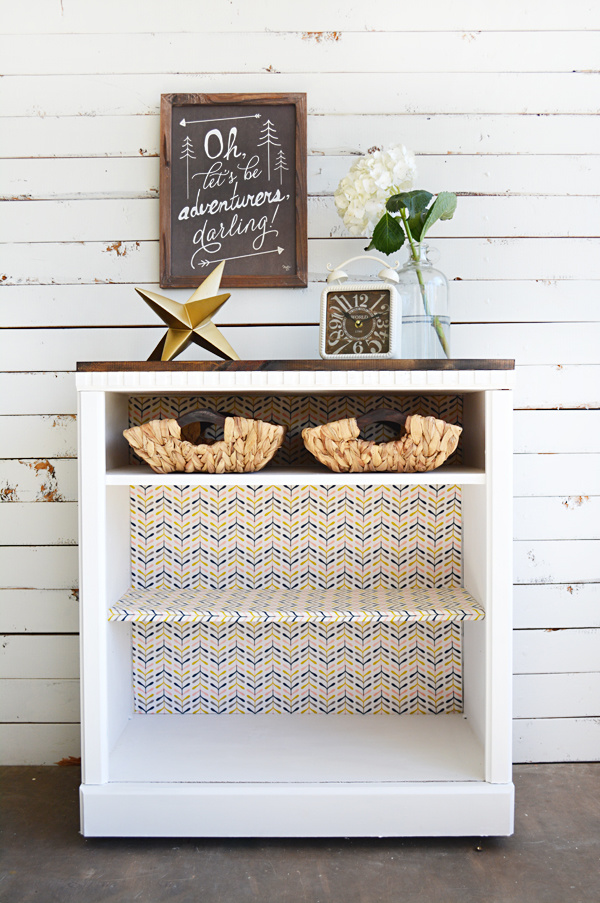
But to me it’s worth it and just adds that little extra something to make a piece unique. And you don’t have to stick to just the drawers, you can use this same technique to cover the inside of a cabinet or the back panel behind a shelf. So many possibilities 🙂
WHAT YOU’LL NEED:
:: Paper or fabric
:: Rotary Cutter/X-Acto Knife
:: Cutting Mat
:: Long ruler (preferably with a cork back)
:: Tape Measurer
:: Pen or pencil
:: Spray Adhesive
:: Credit Card or other type of card for smoothing

STEP 1:
Measuring. This is probably the trickiest part. Most of the time I’ll grab my measuring tape and just write down the dimensions. Another option is to trace the bottom of your drawer directly on to your paper or fabric. Even though the size will be larger than what you need, it’s a good starting point. From there you can just trim down the sides until you get the perfect fit.

STEP 2:
If you have your dimensions written down, grab your material and place it on your cutting board. Using your ruler, measure out the specs and mark the intersecting corners with your pen or pencil. It helps to start at the corner of your material, this way you only have to make two cuts.

STEP 3:
Line up your ruler with your marks. This is where it’s helpful to have a ruler with a cork back. It helps it stay in place and won’t slide around so you can get the perfect cut.
STEP 4:
Cut! Even if I’m using paper, I still use a rotary cutter. Or an X-Acto Knife. Both work great, but stick with the rotary cutter for fabric. Make all the necessary cuts you need and then place your material in your drawer to see if it fits. The majority of the time, it’s not perfect and you’ll need to go back and do some trimming. But now you have your basic shape and can make minor adjustments.

STEP 5:
Grab your spray adhesive and coat the bottom of your drawer with it. I like using the Extra Strength one so I know it’s going to stay in place. Then take your material and start by placing it in the top two corners and work your way back. The great thing about using spray adhesive is that it doesn’t dry immediately. If you don’t place your material in perfectly the first time, you can easily peel it up and try again. Even 2-3 times!


STEP 6:
Using a credit card, library card, starbucks card etc. smooth out all the bubbles. You’ll still be able to peel up the material at this point if you need to.

EXTRA TIPS:
If you have multiple drawers to line, chances are some of them are the same size. Measure out one first and then use that as a template to cut the others.
Make sure that you’re cutting from the same direction of your material. You don’t want to have a crooked pattern 😉
If you’re using paper to line your drawers and you have some access around the edges after you’ve glued it down, use your X-Acto Knife to trim it off.
That’s it! Now you’ve got beautiful lined drawers to go along with your beautifully painted piece of furniture 🙂
Now I mentioned that I like to use paper and fabric to line my drawers so I wanted to share some of my resources where I find my material.
Spoonflower
This is probably my favorite site to look first. They have hundreds of different patterns and so many trendy, modern designs. I usually buy their Matte Gift Wrap and always end up spending WAY too long browsing their site. Plus you can upload your own design and create custom fabric or paper out of it! I haven’t done this yet but it’s on my to do list 🙂
Jo-Anns
If I’m looking for fabric and don’t have time to order online, I’ll head here. And don’t forget to use coupons!
Rifle Paper Co.
I wish I owned everything from here. Although their gift wrap selection isn’t huge, the designs are just SO pretty. The first time I used their paper was on my Mint Buffet and I know it won’t be my last.
Home Goods
Or TJ Max or Marshalls. All of these stores always have a little basket of gift wrap or wrapping paper. Usually fun and bright patterns.
Fabric.com
A great online resource for fabric. If I plan far enough ahead (which isn’t often) I’ll peruse this site and their hundreds of patterns.
Minted
I haven’t bought any paper from Minted yet, but they have a pretty big selection and a lot of the gift wrap is customizable. Would be fun to use if you were redoing a piece of furniture as a gift 🙂
I’m a little partial to using paper, just because I find it’s easier to cut and you can get straighter lines that don’t fray 😉 But there are SO many fun fabric patterns that sometimes that’s the better option!
I hope this tutorial was helpful! It can be a bit frustrating at times getting the exact measurements down and you’ll probably end up ruining a few pieces before you get it right; I know I did 😉 But it’s definitely worth it in the end to have that special touch that ties everything together!


Carol-Lee Grams
How hard is it to remove the paper? I’m assuming it would have to be sanded down again?
brepurposed
You should be able to peel most of it off but may have to do a little sanding too!
Cyd
Loving all of these different patterns!
brepurposed
Thanks Cyd!!
Kristi
I’ve always wondered how you did it and how perfect that you’ve listed your fab sources!!! I will definitely be putting this to work soon!!!
brepurposed
Thanks Kristi! Hope it was helpful 🙂
Susan Dingman
This is a great tutorial. For me, instead of measuring, I use a bunch of pieces if copy paper and put them in the drawer. I overlap them to completely cover the space and then tape together. This creates a perfectly sized template. Then I just lay that out over the fabric and cut around with the rotary cutter and ruler.
brepurposed
Thank you Susan! And that sounds like an awesome idea! I’ll have to try that the next time 😉